

Lightless: The 21st Sacrifice (Episode 1) Full Walkthrough
Lightless: The 21st Sacrifice (Episode 1) Full Walkthrough
If you play Lightless: The 21st Sacrifice (Episode 1) and looking for a 100% walkthrough, this guide is exactly what you are looking for providing a complete walkthrough with images, let’s check it out.
Table of Contents
The Hotel Room – How to Leave
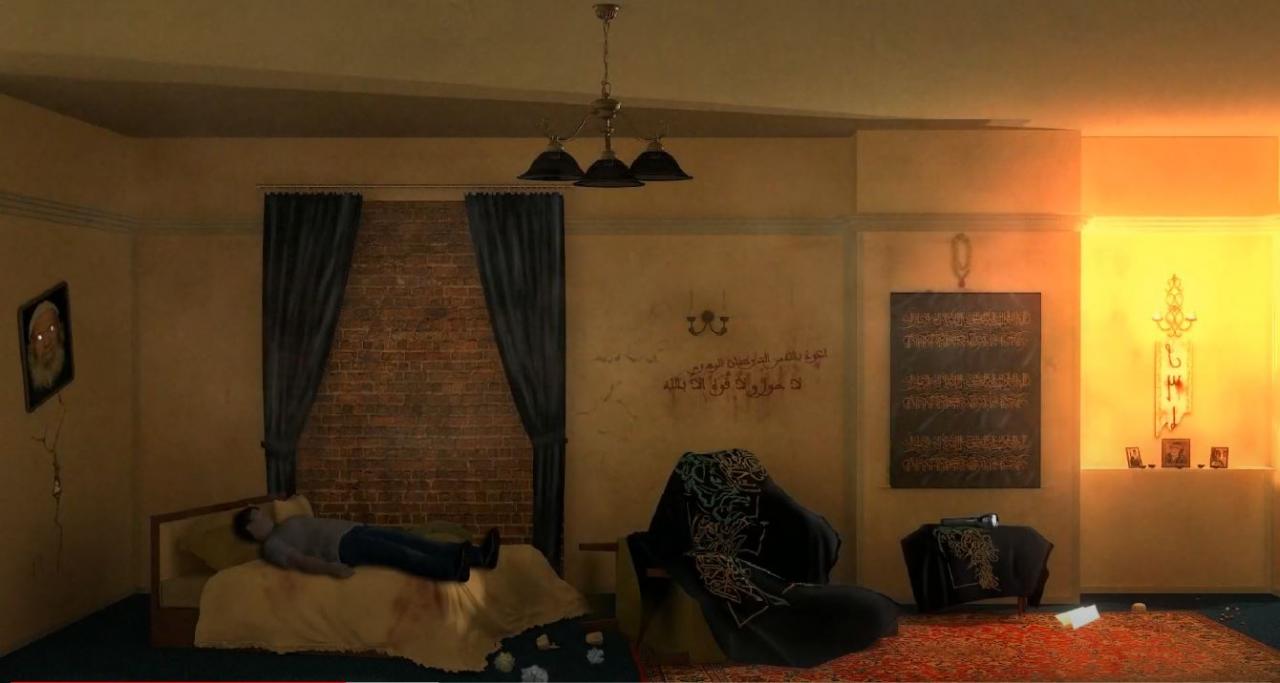
You enter into your room after traveling to Iran to wax nostalgic about your childhood days. Hover and click over objects to interact. A magnifying glass will appear if you can investigate, and a hand will appear if you’re able to lift the object.
1. In this room, you pick up a camera. In order to access the camera or any items you pick up throughout the game, hover your mouse to the top of the screen for the drop-down menu. Select the camera in the drop down menu (not the bottom left icon) and snap a picture of the empty frame hanging on the wall to the left of the room by the bed. You’ll receive a picture sending you a creepy message, which triggers the onset of a fog and a drop off to sleep for Navid.
2. The hotel room has changed when you wake up. You are able to leave, but take note of the changes to the room- you’ll be returning here, as you’ll return to all the rooms at least once, to interact. Leave out the door and enter the next up the flight of stairs, Navid will recognize it as Raha’s childhood home.
Raha’s House – The First Banner Unlock
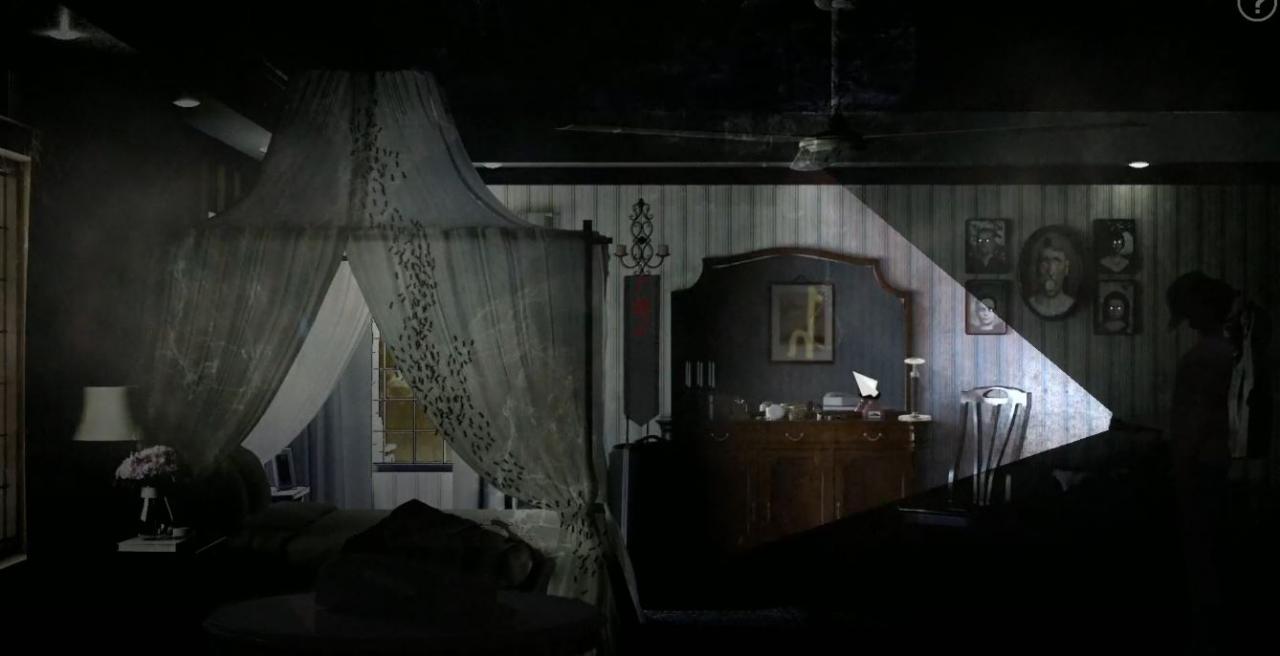
All the rest of the doors are locked, but you’re able to go upstairs. You’ll notice a broken transistor radio. You pass by the grandfather clock and are able to peer into a bedroom, but this will remain locked for now too. This is Iraj’s and his wife Fariba’s bedroom. On the floor next to Iraj’s bedroom and the boarded door, you will be able to pick up a safety glove.
3. If you continue onto the left, you’ll notice someone has tried to block the hallway. There’s a door locked by the darkness, which you will be able to access later. To the left of this door, you receive your first symbol which you will need to write on the first banner to banish the darkness. As described on the wall, you will need a paint brush and your blood.
4. It’s time to use the safety glove you have picked up. Go back downstairs and to the very first locked door. Use the gloves from your inventory to switch on the light and investigate the bathroom through the peep-hole. You won’t be able to enter the room, but you’ll notice a dead body and a broken bottle. As you walk back to the right through the house, you will begin to hear chanting.
5. You will have to go upstairs and interact with the transistor radio to shut off the chanting. This results in the sound of a door opening. Go downstairs to investigate the changes to the house. You are now able to enter the bathroom, and interact with things inside. You get a scrub brush off the bathroom sink, and you cut your hand on the broken bottle on the toilet, resulting in blood on the floor. It will be this blood you combine with the paintbrush to write the symbol. You can pick up another note from top of the hamper.

6. After you’ve combined the paint brush with your blood on the floor, you get a bloody paintbrush. Return upstairs to write the first symbol and banish the darkness.
Raha’s House – Second and Third Banner Unlock
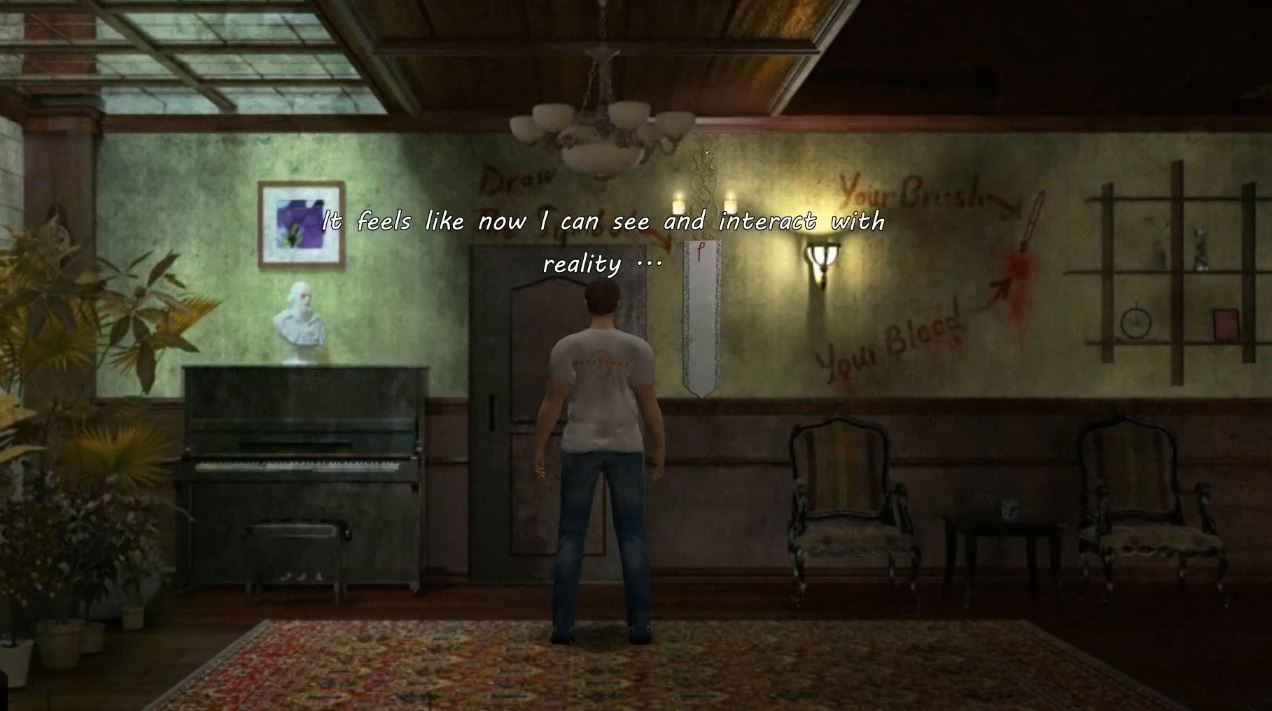
After you’ve written the symbol to the first banner, the darkness in this area is banished and you are able to interact with reality again. The new unlocked rooms are your keys to progressing.
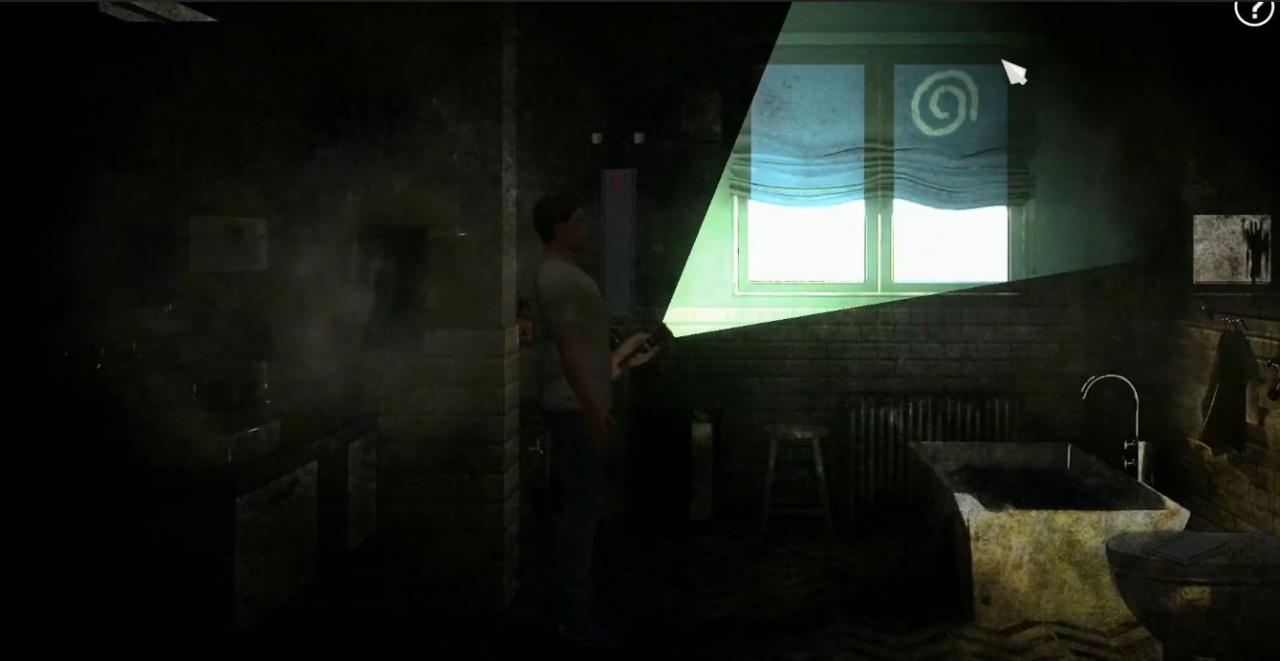
1. Although the darkness is lifted, the door at the left-most of the house remains locked. However, a little bit to your right, a door is now lit up and ready to explore. Enter in and it reveals another bathroom, sealed by darkness.
2. To acclimate you to the game, the next symbol is an easy spot. It’s right there in the bathroom. After you’ve written this on the banner inside the bathroom, you will have already banished your second bit of darkness.
3. The second banner is unlocked and now you can interact with items in the bathroom. There’s a newspaper on the toilet by the bloody bath; there is liquid detergent on top of the washer; when you investigate the bathroom sink, you will notice a screwdriver you cannot pick up. The game says that it is too rusted to be useful. You notice something shiny on top of the bathroom mirror, but it is out of reach. Here is where your fly swatter comes into play, landing you a key.
4. Take the bronze key and go downstairs. As you do, you will notice that the house has once again changed. Giant red letters appear on Raha’s door, which you’re able to investigate. Directly to the right of the stairwell you use the key to unlock the door. It’s a study/computer room, shrouded in darkness. Here is the third banner, but you’ll notice, there is no symbol painted inside. Though, you do find a surprise.
5. This causes us to recall what we’ve grabbed from the unlocked upstairs bathroom. Combine the liquid detergent with the scrub brush to create a soaked brush. This is going to help us find the symbol needed to unlock the study. As you’ll recall after leaving your hotel room, there is a musty sign on the way up to Raha’s door. This is where we’ll uncover the symbol.
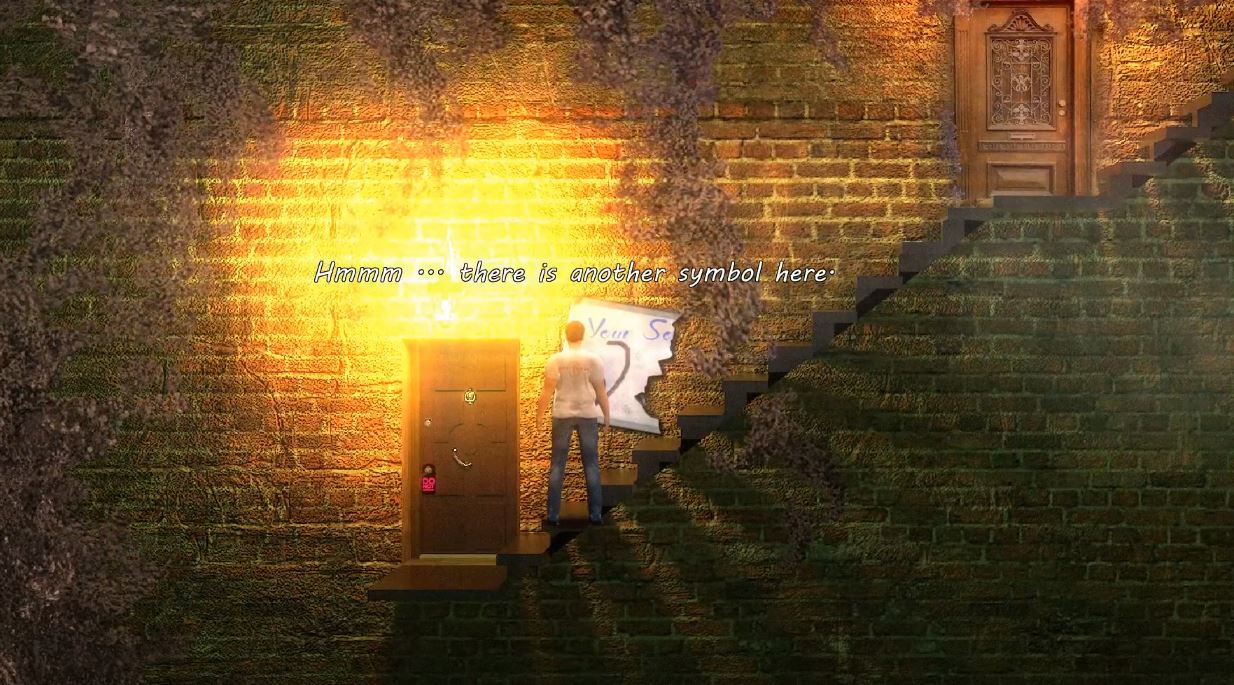
Go and write the symbol on the banner in the study.
Raha’s House – Fourth Banner Unlocked
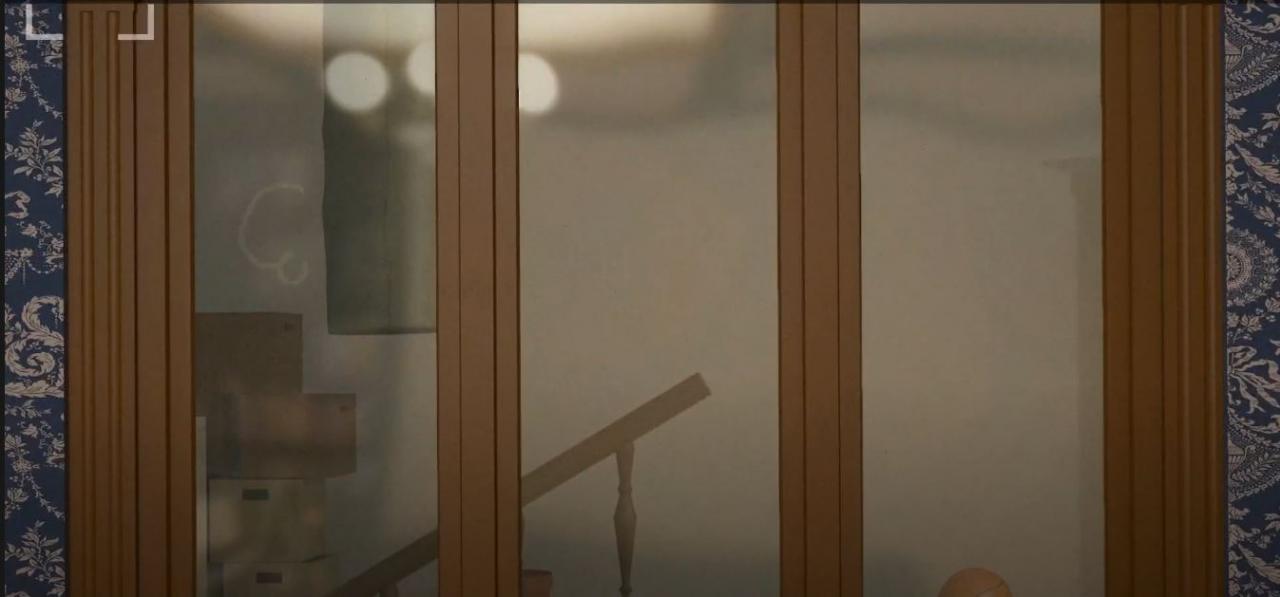
So you have just unlocked the study on the ground floor of the house, and you’re able to interact with the room. There’s a window to your right which appears useless- which only for right now, it is. There is a computer, but the power cable is missing.
1. Grab the paperclip off of the desk. There is also a newspaper on the bookshelf. The paperclip unlocks the dresser in the hall right beside the study. When you use the paperclip on the table, you will receive men’s perfume. You take note that this is the perfume Iraj wore.
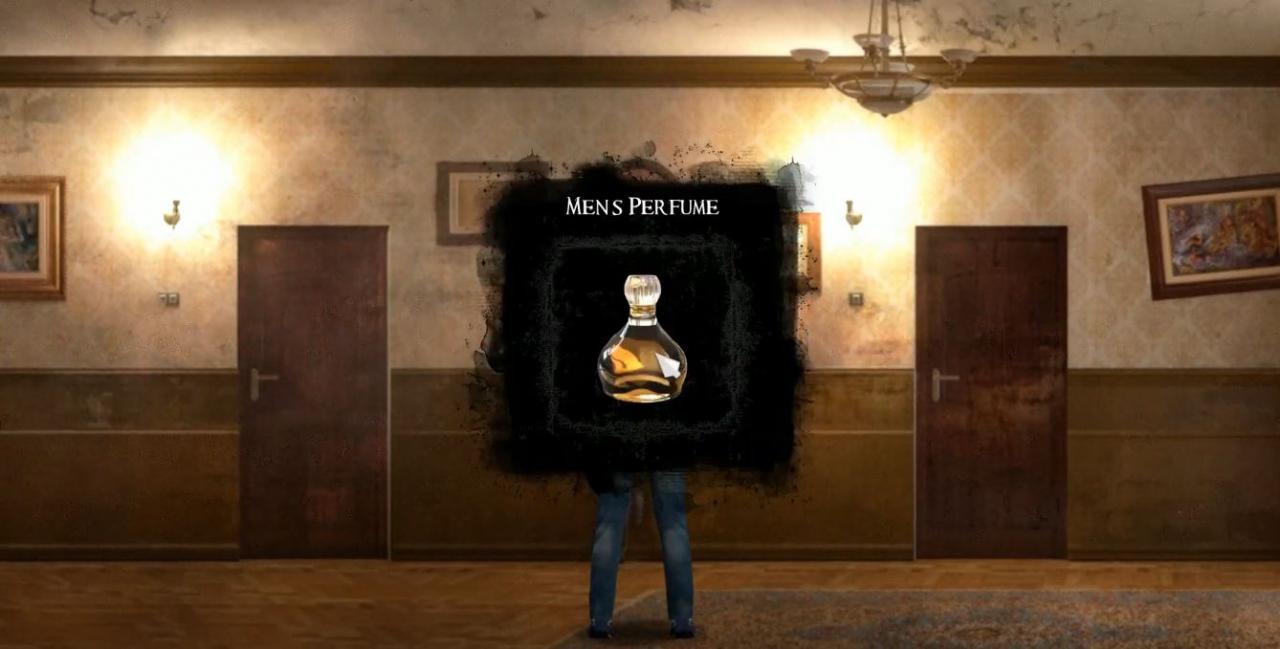
3. Fariba is Iraj’s wife, and the one holding the door shut to the upstairs bedroom with the noose. You take the men’s perfume and spray it on the door. This tricks her into thinking you are “him”, Iraj, and the door unlocks.
4. As soon as you investigate the room with your flashlight, you will notice a symbol reflected in the mirror.
Take note that the symbol is not written on the mirror, but on the wall behind you. You will need to write the symbol flipped horizontally.
**If you get stuck with the spirit in the room, remember to point your flashlight directly in front of you, do not tilt it around**
Raha’s House – Fifth Banner Unlocked
You have just freed Iraj and Fariba’s bedroom from darkness. It is time to gather the items in the room and to progress onto the fifth banner.
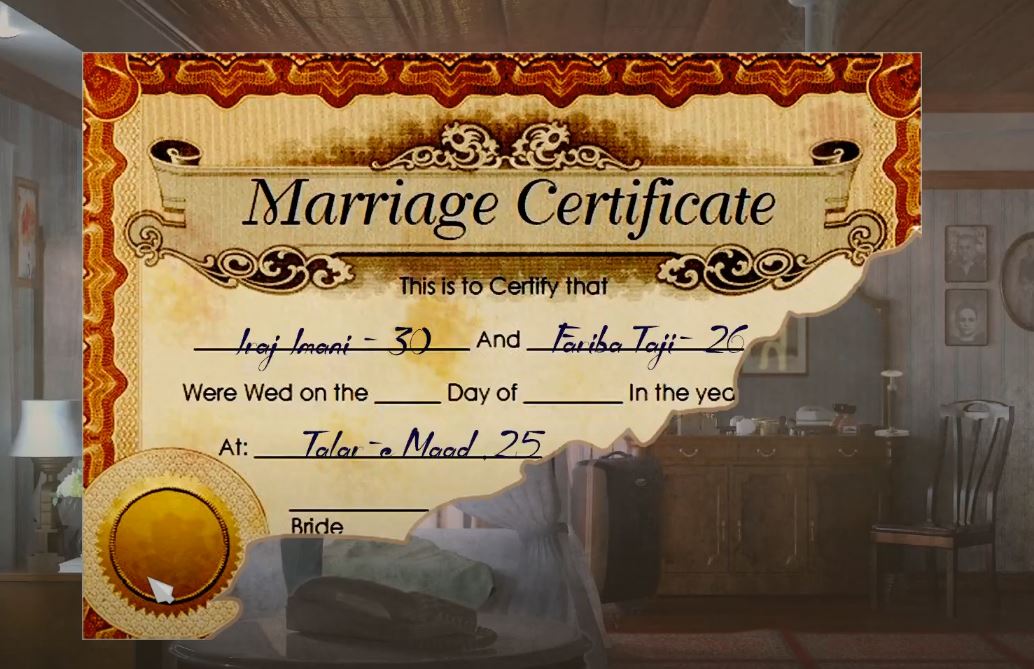
1. Two items of note in the dresser to the far left of the room. This will be the marriage certificate which provides an important clue for later (take a picture, you cannot take the clipping with you)- and a light bulb.
2. Take the light bulb and screw it into the room leading down into the basement. This will provide you with two things, but only one you’ll notice- and that is access to the basement itself. The second is that you’ve just illuminated the next symbol you will need to dispel the darkness in the basement.
6. When you investigate the window in the room leading to the basement, it mentions the study. Return to the study and back to the window – you’ll now be able to see the symbol painted on the wall.
Return to the basement and draw the symbol.
Raha’s House – Computer Passcode, Leading up to 6th Banner
You have now unlocked the basement and are close to the end-game. In the basement you will uncover a light bulb, another newspaper article, power cable, and by this time you will also receive a wooden handle as well as a box cutter.
1. The light bulb goes to Iraj’s room upstairs but you’ll be prompted to notice there is no lamp shade. You can plug the power cable into the pc in the study, but you will be locked out by a passcode which is Iraj’s birthday. To receive this date, you will first need to discover the lampshade.
2. Return to your hotel room. Use the box cutter on the hollowed out floor to retrieve a shovel blade, a gun, and a clue as to where the bullet is.
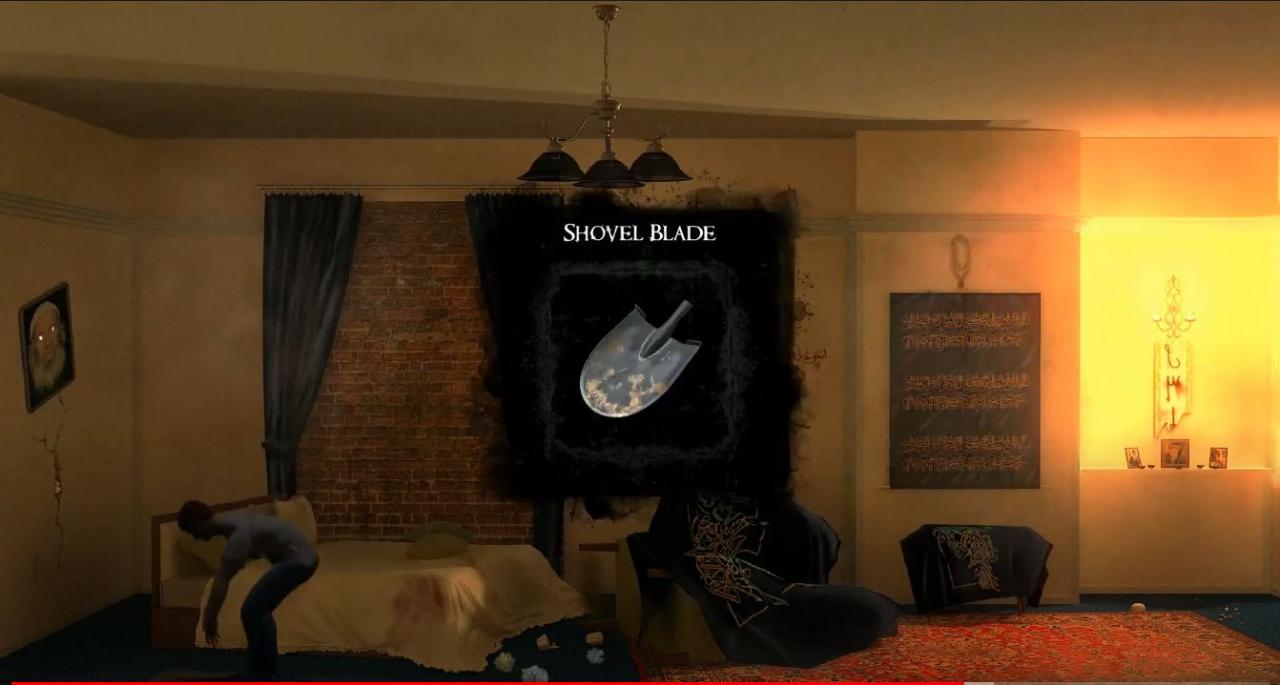
Combine the wooden handle with the shovel blade. You can use this shovel in two places, the first step would be to use it on the broken tiles in the kitchen.
3. In the broken tiles you will uncover the lampshade. Take the lampshade to the bedroom and a message will be scrawled revealing the 5th anniversary of Iraj and Fariba, as well as the fact this coincides with Iraj’s birthday- so we can now unlock the computer in the study. They’ve been married since Iraj was 30 years old, this is their 5th anniversary, take the date and subtract 35 years- the passcode being: 1954-02-25.
4. You will listen to some messages on the PC, which triggers an event upstairs in the bedroom. You hear the phone ring, and when you answer it, you hear a woman wailing- and then are able to reenact Saeed’s dream in the mirror. This triggers the passcode for our next steps, so memorize it.
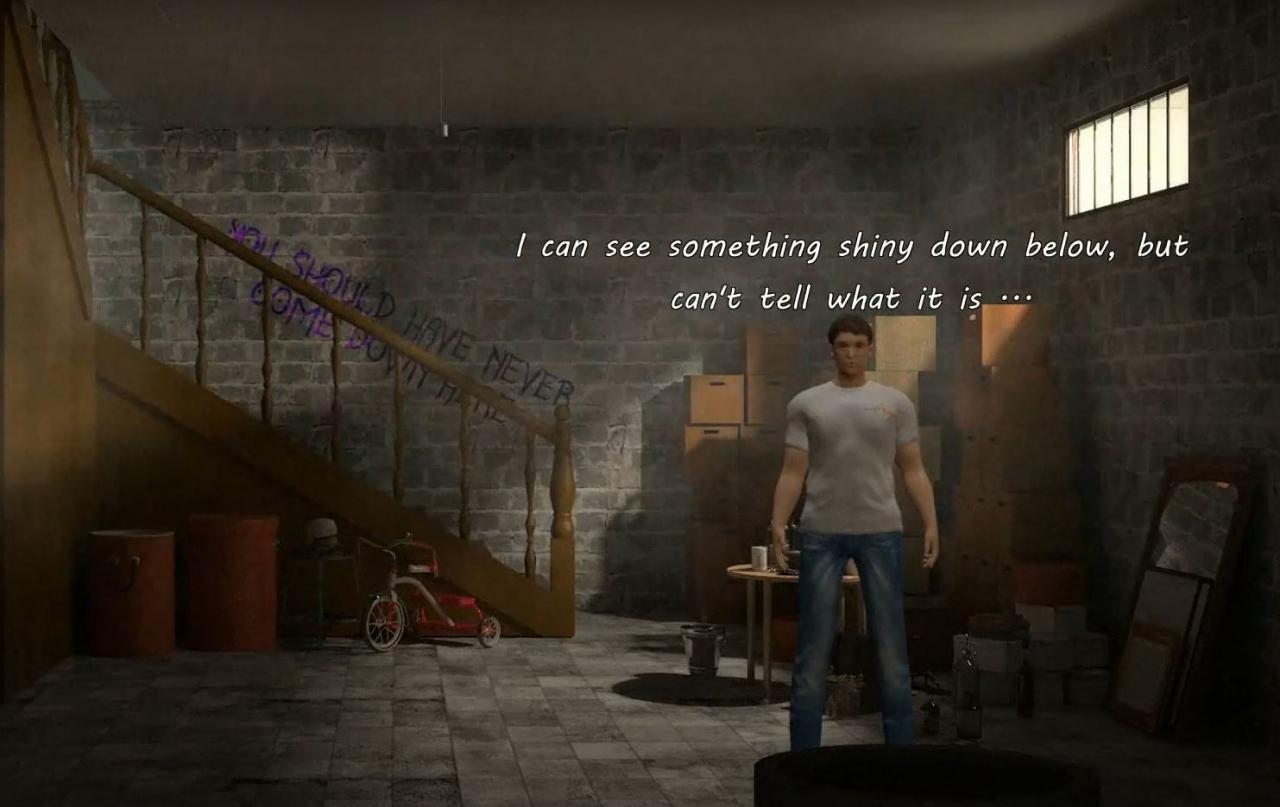
5. Taking the shovel to the basement, you are able to use the shovel to remove the mound of dirt- revealing a well and a door handle. There is something shiny at the bottom of the well, but you cannot reach it. The door handle goes to the upstairs room at the very end, near the piano. This will be where the 6th banner is.
To END – 6th Banner Unlock and Ending Explained
1. Walk to the end of the room. This will trigger the doll to begin playing the violin. Leave the room, and you will notice a new message scrawled in blood above the piano. “Come Play With Me,” it invites. The violin playing is the clue. You will need to play 4 notes on the piano, in descending order.
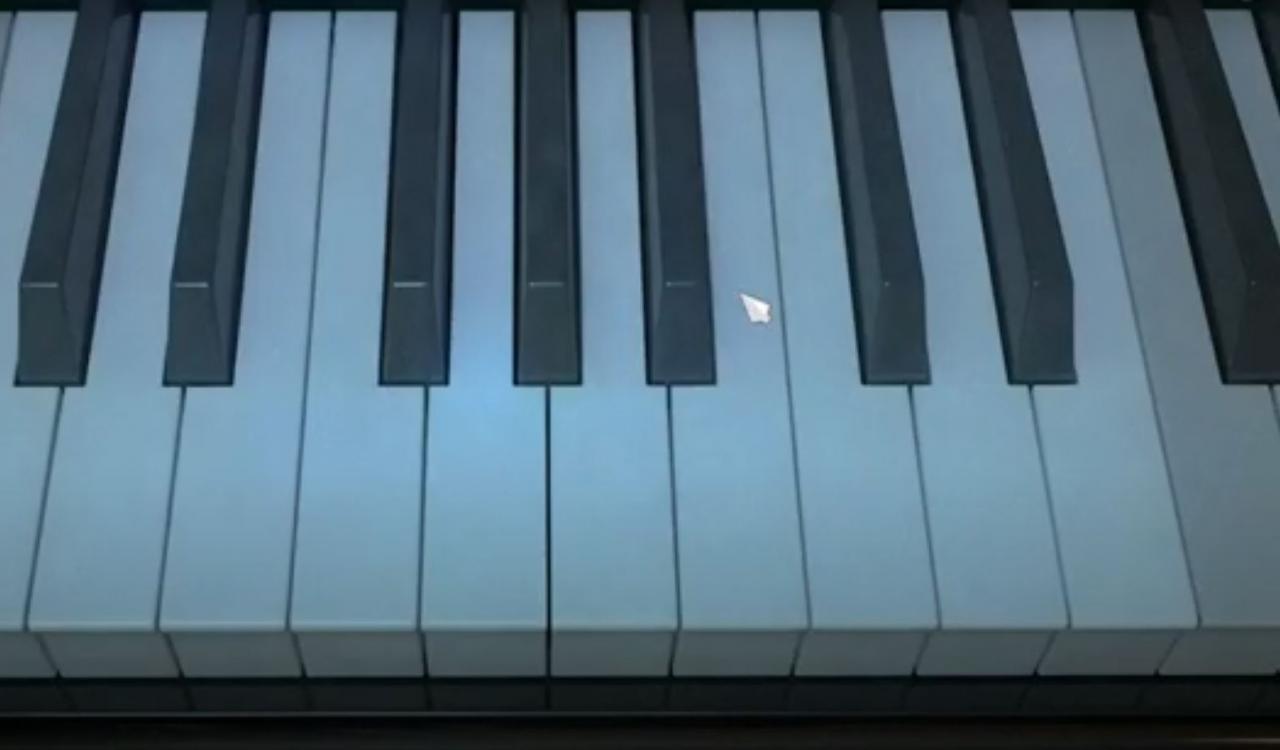
If you get stuck, I hover my mouse in the above picture against the first key to play. Click every key to the left until you’ve had the four notes play.
2. Entering back into the room, you see the symbol for the room’s banner- it was hidden behind the doll playing the violin. Write this on the banner and banish the darkness. Here you grab pliers, and are able to cut open the doll and remove the bullet. There is also a newspaper.
3. Combine the bullet with the gun to create a loaded gun. Use the pliers on the fork to bend it, rendering a bent fork. You’ve just recovered the items that will help you to reach down to the bottom of the well in the basement.
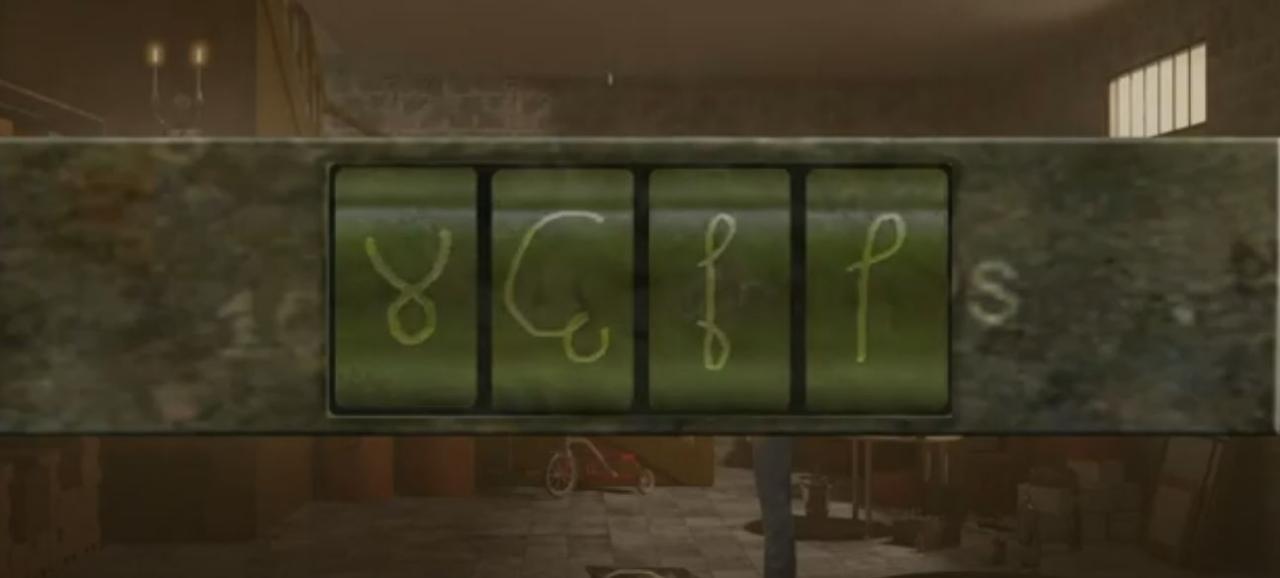
Go back outside and walk all the way up to the top of the stair case. Use the gun on the chain, and attach the chain to the bent fork. This creates a grappling hook. Take this and use it on the well in the basement; you will retrieve a metal box. It has a locking mechanism on it of four symbols. If you have forgotten the passcode, you can find it upstairs in the mirror– or you can view it here down below:
4. From the box you receive scented candles. Good job, you are about to finish the game! Take the candles into the downstairs bathroom, where Iraj had been shot and you had cut your hand on the bottle. Take the candles and put them in the holders. Nothing seems to happen. Do it again, and the lights will go out- your flashlight along with it.
Don’t worry, you don’t need your flashlight. Explore the darkness. You will see the hall from your dreams, with a light at the far end. When you click the final banner before you are ready, you can run to this light to stay alive.
5. There are 21 symbols on the wall- and this is a huge clue. You write the right symbol on the final banner to end the game. So what is it? Check out the bottom-most left letter. Look like an A. I drew more of an ^ and the banner unlocked.
That’s all we are sharing today in Lightless: The 21st Sacrifice (Episode 1) Full Walkthrough, if there are anything you want to add please feel free to leave a comment below and we’ll see you soon.
Как играется?
А по-прежнему играется. Всё также затягивающе и гипнотически-осязательно. Разработчики явно не собирались отказываться от выведенной три года назад успешной формулы, так что концепция неизменна: есть помещение, есть механизм, есть механизмы внутри механизма, и в них, если поискать, тоже наверняка найдётся какой-нибудь «-изм». Конечная задача — выбраться на свободу (ну или хотя бы куда-нибудь), умело используя все доступные шестерёнки, педальки и потайные клавиши.


Основное отличие третьей «Комнаты» от предыдущих частей — собственно, количество комнат. Если первая The Room была скорее The Box, а вторая как раз более-менее оправдывала своё название (пусть локация там была и не одна), то третью серию франшизы стоило бы назвать The Rooms. Потому как на этот раз в нашем распоряжении целый замок. Зловещий, покинутый всеми, пухнущий от загадок и расположенный на изолированном острове — параллели с Myst так и напрашиваются.
И всё бы ничего (больше карта — больше фана), вот только передвигаться самостоятельно главный герой так и не научился. Переключаться от объекта к объекту — это пожалуйста, а сделать два шага по направлению к стене, чтобы висящий на ней условный план лабиринта оставался в зоне видимости — нет, увы. С одной стороны, чудовищно неудобно. С другой — таким образом авторы непрозрачно напоминают нам: пазлы превыше всего, а квесты-бродилки ищите где-нибудь ещё.


Лавкрафтианский сюжет про поиски неведомого, немыслимого (Богохульного! Нечестивого!) Нуля скромен и выступает здесь в качестве заводской смазки для хитроумных головоломок. А вот на разнообразие задачек создатели не поскупились. Этого добра — на любой вкус: от примитивных пятнашек и до объёмных моделей, требующих особенного угла обзора, или, например, сложных движущихся конструкций, которыми нужно отбросить тень правильной формы. Но основа основ тут, как и раньше, — шкатулки «с секретом». Вертеть, нажимать, переключать и доводить на них рычаги и детальки — истинное удовольствие, настоящий гимн тактильности и виртуальный рай для кинестетиков.
Однако трогать всё это куда приятнее, чем непосредственно разгадывать (особенно если проходишь запоем), потому что всерьёз корпеть над The Room Three невозможно. Чтобы осилить большинство пазлов, достаточно базового логического мышления и наблюдательности: щелкаются они на раз-два. К тому же, безотказная система многоуровневых подсказок (отключаемых, кстати) всегда к нашим услугам. Вот только хинты эти в некотором смысле коварны: если слепо следовать всем наводящим советам, есть риск упустить из виду кучу побочных объектов разной степени важности и нужности. До какой-никакой концовки подсказки вас, конечно, доведут, но её тональность будет не самой удачной с точки зрения сюжета. Лень наказуема, ага.


Ах да, вас ждёт по меньшей мере четыре варианта финала. Официально они триггерятся в зависимости от совершенных игроком действий и выборов, но по факту — благодаря упущенным из виду объектам и провороненным тайникам. Впрочем, провернуть назад невозможно только фарш, и по завершении первичного прохождения появляется шанс добраться-таки до альтернативной развязки и изменить свою судьбу. Хинтов свыше в таком режиме уже не положено. Тут-то всё самое интересное и начинается — беготня по комнатам, внимательное чтение интригующих записок от явно полоумного Мастера, перебор предметов в инвентаре. В общем, наш вам совет: отключайте подсказки сразу, веселее будет в разы.
Lightless: The 21st Sacrifice (Episode 1) Full Walkthrough
If you play Lightless: The 21st Sacrifice (Episode 1) and looking for a 100% walkthrough, this guide is exactly what you are looking for providing a complete walkthrough with images, let’s check it out.
Table of Contents
The Hotel Room – How to Leave
You enter into your room after traveling to Iran to wax nostalgic about your childhood days. Hover and click over objects to interact. A magnifying glass will appear if you can investigate, and a hand will appear if you’re able to lift the object.
1. In this room, you pick up a camera. In order to access the camera or any items you pick up throughout the game, hover your mouse to the top of the screen for the drop-down menu. Select the camera in the drop down menu (not the bottom left icon) and snap a picture of the empty frame hanging on the wall to the left of the room by the bed. You’ll receive a picture sending you a creepy message, which triggers the onset of a fog and a drop off to sleep for Navid.
2. The hotel room has changed when you wake up. You are able to leave, but take note of the changes to the room- you’ll be returning here, as you’ll return to all the rooms at least once, to interact. Leave out the door and enter the next up the flight of stairs, Navid will recognize it as Raha’s childhood home.
Raha’s House – The First Banner Unlock
All the rest of the doors are locked, but you’re able to go upstairs. You’ll notice a broken transistor radio. You pass by the grandfather clock and are able to peer into a bedroom, but this will remain locked for now too. This is Iraj’s and his wife Fariba’s bedroom. On the floor next to Iraj’s bedroom and the boarded door, you will be able to pick up a safety glove.
3. If you continue onto the left, you’ll notice someone has tried to block the hallway. There’s a door locked by the darkness, which you will be able to access later. To the left of this door, you receive your first symbol which you will need to write on the first banner to banish the darkness. As described on the wall, you will need a paint brush and your blood.
4. It’s time to use the safety glove you have picked up. Go back downstairs and to the very first locked door. Use the gloves from your inventory to switch on the light and investigate the bathroom through the peep-hole. You won’t be able to enter the room, but you’ll notice a dead body and a broken bottle. As you walk back to the right through the house, you will begin to hear chanting.
5. You will have to go upstairs and interact with the transistor radio to shut off the chanting. This results in the sound of a door opening. Go downstairs to investigate the changes to the house. You are now able to enter the bathroom, and interact with things inside. You get a scrub brush off the bathroom sink, and you cut your hand on the broken bottle on the toilet, resulting in blood on the floor. It will be this blood you combine with the paintbrush to write the symbol. You can pick up another note from top of the hamper.
6. After you’ve combined the paint brush with your blood on the floor, you get a bloody paintbrush. Return upstairs to write the first symbol and banish the darkness.
Raha’s House – Second and Third Banner Unlock
After you’ve written the symbol to the first banner, the darkness in this area is banished and you are able to interact with reality again. The new unlocked rooms are your keys to progressing.
1. Although the darkness is lifted, the door at the left-most of the house remains locked. However, a little bit to your right, a door is now lit up and ready to explore. Enter in and it reveals another bathroom, sealed by darkness.
2. To acclimate you to the game, the next symbol is an easy spot. It’s right there in the bathroom. After you’ve written this on the banner inside the bathroom, you will have already banished your second bit of darkness.
3. The second banner is unlocked and now you can interact with items in the bathroom. There’s a newspaper on the toilet by the bloody bath; there is liquid detergent on top of the washer; when you investigate the bathroom sink, you will notice a screwdriver you cannot pick up. The game says that it is too rusted to be useful. You notice something shiny on top of the bathroom mirror, but it is out of reach. Here is where your fly swatter comes into play, landing you a key.
4. Take the bronze key and go downstairs. As you do, you will notice that the house has once again changed. Giant red letters appear on Raha’s door, which you’re able to investigate. Directly to the right of the stairwell you use the key to unlock the door. It’s a study/computer room, shrouded in darkness. Here is the third banner, but you’ll notice, there is no symbol painted inside. Though, you do find a surprise.
5. This causes us to recall what we’ve grabbed from the unlocked upstairs bathroom. Combine the liquid detergent with the scrub brush to create a soaked brush. This is going to help us find the symbol needed to unlock the study. As you’ll recall after leaving your hotel room, there is a musty sign on the way up to Raha’s door. This is where we’ll uncover the symbol.
Go and write the symbol on the banner in the study.
Raha’s House – Fourth Banner Unlocked
So you have just unlocked the study on the ground floor of the house, and you’re able to interact with the room. There’s a window to your right which appears useless- which only for right now, it is. There is a computer, but the power cable is missing.
1. Grab the paperclip off of the desk. There is also a newspaper on the bookshelf. The paperclip unlocks the dresser in the hall right beside the study. When you use the paperclip on the table, you will receive men’s perfume. You take note that this is the perfume Iraj wore.
3. Fariba is Iraj’s wife, and the one holding the door shut to the upstairs bedroom with the noose. You take the men’s perfume and spray it on the door. This tricks her into thinking you are “him”, Iraj, and the door unlocks.
4. As soon as you investigate the room with your flashlight, you will notice a symbol reflected in the mirror.
Take note that the symbol is not written on the mirror, but on the wall behind you. You will need to write the symbol flipped horizontally.
**If you get stuck with the spirit in the room, remember to point your flashlight directly in front of you, do not tilt it around**
Raha’s House – Fifth Banner Unlocked
You have just freed Iraj and Fariba’s bedroom from darkness. It is time to gather the items in the room and to progress onto the fifth banner.
1. Two items of note in the dresser to the far left of the room. This will be the marriage certificate which provides an important clue for later (take a picture, you cannot take the clipping with you)- and a light bulb.
2. Take the light bulb and screw it into the room leading down into the basement. This will provide you with two things, but only one you’ll notice- and that is access to the basement itself. The second is that you’ve just illuminated the next symbol you will need to dispel the darkness in the basement.
6. When you investigate the window in the room leading to the basement, it mentions the study. Return to the study and back to the window – you’ll now be able to see the symbol painted on the wall.
Return to the basement and draw the symbol.
Raha’s House – Computer Passcode, Leading up to 6th Banner
You have now unlocked the basement and are close to the end-game. In the basement you will uncover a light bulb, another newspaper article, power cable, and by this time you will also receive a wooden handle as well as a box cutter.
1. The light bulb goes to Iraj’s room upstairs but you’ll be prompted to notice there is no lamp shade. You can plug the power cable into the pc in the study, but you will be locked out by a passcode which is Iraj’s birthday. To receive this date, you will first need to discover the lampshade.
2. Return to your hotel room. Use the box cutter on the hollowed out floor to retrieve a shovel blade, a gun, and a clue as to where the bullet is.
Combine the wooden handle with the shovel blade. You can use this shovel in two places, the first step would be to use it on the broken tiles in the kitchen.
3. In the broken tiles you will uncover the lampshade. Take the lampshade to the bedroom and a message will be scrawled revealing the 5th anniversary of Iraj and Fariba, as well as the fact this coincides with Iraj’s birthday- so we can now unlock the computer in the study. They’ve been married since Iraj was 30 years old, this is their 5th anniversary, take the date and subtract 35 years- the passcode being: 1954-02-25.
4. You will listen to some messages on the PC, which triggers an event upstairs in the bedroom. You hear the phone ring, and when you answer it, you hear a woman wailing- and then are able to reenact Saeed’s dream in the mirror. This triggers the passcode for our next steps, so memorize it.
5. Taking the shovel to the basement, you are able to use the shovel to remove the mound of dirt- revealing a well and a door handle. There is something shiny at the bottom of the well, but you cannot reach it. The door handle goes to the upstairs room at the very end, near the piano. This will be where the 6th banner is.
To END – 6th Banner Unlock and Ending Explained
1. Walk to the end of the room. This will trigger the doll to begin playing the violin. Leave the room, and you will notice a new message scrawled in blood above the piano. “Come Play With Me,” it invites. The violin playing is the clue. You will need to play 4 notes on the piano, in descending order.
If you get stuck, I hover my mouse in the above picture against the first key to play. Click every key to the left until you’ve had the four notes play.
2. Entering back into the room, you see the symbol for the room’s banner- it was hidden behind the doll playing the violin. Write this on the banner and banish the darkness. Here you grab pliers, and are able to cut open the doll and remove the bullet. There is also a newspaper.
3. Combine the bullet with the gun to create a loaded gun. Use the pliers on the fork to bend it, rendering a bent fork. You’ve just recovered the items that will help you to reach down to the bottom of the well in the basement.
Go back outside and walk all the way up to the top of the stair case. Use the gun on the chain, and attach the chain to the bent fork. This creates a grappling hook. Take this and use it on the well in the basement; you will retrieve a metal box. It has a locking mechanism on it of four symbols. If you have forgotten the passcode, you can find it upstairs in the mirror– or you can view it here down below:
4. From the box you receive scented candles. Good job, you are about to finish the game! Take the candles into the downstairs bathroom, where Iraj had been shot and you had cut your hand on the bottle. Take the candles and put them in the holders. Nothing seems to happen. Do it again, and the lights will go out- your flashlight along with it.
Don’t worry, you don’t need your flashlight. Explore the darkness. You will see the hall from your dreams, with a light at the far end. When you click the final banner before you are ready, you can run to this light to stay alive.
5. There are 21 symbols on the wall- and this is a huge clue. You write the right symbol on the final banner to end the game. So what is it? Check out the bottom-most left letter. Look like an A. I drew more of an ^ and the banner unlocked.
That’s all we are sharing today in Lightless: The 21st Sacrifice (Episode 1) Full Walkthrough, if there are anything you want to add please feel free to leave a comment below and we’ll see you soon.
Итоги
Если первый проект Fireproof Games был и остаётся безусловно новаторским, то последний выпуск «комнатной» франшизы не предлагает нам ничего принципиально нового, однако продолжает качественно и последовательно развивать проверенную временем и миллионами игроков концепцию. The Room Three — это эволюция в деталях, усовершенствованная формула, доведённая в своей эффективности до абсолюта.
Да, изредка игра обращается к самоцитированию: дублирует механику и копирует уже хорошо знакомую модель решения задачек, но ведь именно за эти механику и модель The Room и полюбили во всём мире, разве не так? Не отказывайте себе в удовольствии и вы. С учетом курса и нынешней ценовой политики некоторых издателей три неполных сотни рублей за такое сокровище — это всё равно что даром.
Достоинства:
- исключительная тактильность и оптимальное раскрытие возможностей тачскрина;
- ненавязчивый, но интригующий сюжет и атмосферный игровой мир;
- обилие локаций и оригинальных пазлов;
- идеальное визуальное воплощение;
- блестящая русскоязычная локализация;
- судьба героя полностью в ваших руках.
Недостатки:
- излишняя простота и интуитивная доступность головоломок;
- традиционно опаздывающая версия под Android.
Lightless: The 21st Sacrifice (Episode 1) Full Walkthrough
If you play Lightless: The 21st Sacrifice (Episode 1) and looking for a 100% walkthrough, this guide is exactly what you are looking for providing a complete walkthrough with images, let’s check it out.
Table of Contents
The Hotel Room – How to Leave
You enter into your room after traveling to Iran to wax nostalgic about your childhood days. Hover and click over objects to interact. A magnifying glass will appear if you can investigate, and a hand will appear if you’re able to lift the object.
1. In this room, you pick up a camera. In order to access the camera or any items you pick up throughout the game, hover your mouse to the top of the screen for the drop-down menu. Select the camera in the drop down menu (not the bottom left icon) and snap a picture of the empty frame hanging on the wall to the left of the room by the bed. You’ll receive a picture sending you a creepy message, which triggers the onset of a fog and a drop off to sleep for Navid.
2. The hotel room has changed when you wake up. You are able to leave, but take note of the changes to the room- you’ll be returning here, as you’ll return to all the rooms at least once, to interact. Leave out the door and enter the next up the flight of stairs, Navid will recognize it as Raha’s childhood home.
Raha’s House – The First Banner Unlock
All the rest of the doors are locked, but you’re able to go upstairs. You’ll notice a broken transistor radio. You pass by the grandfather clock and are able to peer into a bedroom, but this will remain locked for now too. This is Iraj’s and his wife Fariba’s bedroom. On the floor next to Iraj’s bedroom and the boarded door, you will be able to pick up a safety glove.
3. If you continue onto the left, you’ll notice someone has tried to block the hallway. There’s a door locked by the darkness, which you will be able to access later. To the left of this door, you receive your first symbol which you will need to write on the first banner to banish the darkness. As described on the wall, you will need a paint brush and your blood.
4. It’s time to use the safety glove you have picked up. Go back downstairs and to the very first locked door. Use the gloves from your inventory to switch on the light and investigate the bathroom through the peep-hole. You won’t be able to enter the room, but you’ll notice a dead body and a broken bottle. As you walk back to the right through the house, you will begin to hear chanting.
5. You will have to go upstairs and interact with the transistor radio to shut off the chanting. This results in the sound of a door opening. Go downstairs to investigate the changes to the house. You are now able to enter the bathroom, and interact with things inside. You get a scrub brush off the bathroom sink, and you cut your hand on the broken bottle on the toilet, resulting in blood on the floor. It will be this blood you combine with the paintbrush to write the symbol. You can pick up another note from top of the hamper.
6. After you’ve combined the paint brush with your blood on the floor, you get a bloody paintbrush. Return upstairs to write the first symbol and banish the darkness.
Raha’s House – Second and Third Banner Unlock
After you’ve written the symbol to the first banner, the darkness in this area is banished and you are able to interact with reality again. The new unlocked rooms are your keys to progressing.
1. Although the darkness is lifted, the door at the left-most of the house remains locked. However, a little bit to your right, a door is now lit up and ready to explore. Enter in and it reveals another bathroom, sealed by darkness.
2. To acclimate you to the game, the next symbol is an easy spot. It’s right there in the bathroom. After you’ve written this on the banner inside the bathroom, you will have already banished your second bit of darkness.
3. The second banner is unlocked and now you can interact with items in the bathroom. There’s a newspaper on the toilet by the bloody bath; there is liquid detergent on top of the washer; when you investigate the bathroom sink, you will notice a screwdriver you cannot pick up. The game says that it is too rusted to be useful. You notice something shiny on top of the bathroom mirror, but it is out of reach. Here is where your fly swatter comes into play, landing you a key.
4. Take the bronze key and go downstairs. As you do, you will notice that the house has once again changed. Giant red letters appear on Raha’s door, which you’re able to investigate. Directly to the right of the stairwell you use the key to unlock the door. It’s a study/computer room, shrouded in darkness. Here is the third banner, but you’ll notice, there is no symbol painted inside. Though, you do find a surprise.
5. This causes us to recall what we’ve grabbed from the unlocked upstairs bathroom. Combine the liquid detergent with the scrub brush to create a soaked brush. This is going to help us find the symbol needed to unlock the study. As you’ll recall after leaving your hotel room, there is a musty sign on the way up to Raha’s door. This is where we’ll uncover the symbol.
Go and write the symbol on the banner in the study.
Raha’s House – Fourth Banner Unlocked
So you have just unlocked the study on the ground floor of the house, and you’re able to interact with the room. There’s a window to your right which appears useless- which only for right now, it is. There is a computer, but the power cable is missing.
1. Grab the paperclip off of the desk. There is also a newspaper on the bookshelf. The paperclip unlocks the dresser in the hall right beside the study. When you use the paperclip on the table, you will receive men’s perfume. You take note that this is the perfume Iraj wore.
3. Fariba is Iraj’s wife, and the one holding the door shut to the upstairs bedroom with the noose. You take the men’s perfume and spray it on the door. This tricks her into thinking you are “him”, Iraj, and the door unlocks.
4. As soon as you investigate the room with your flashlight, you will notice a symbol reflected in the mirror.
Take note that the symbol is not written on the mirror, but on the wall behind you. You will need to write the symbol flipped horizontally.
**If you get stuck with the spirit in the room, remember to point your flashlight directly in front of you, do not tilt it around**
Raha’s House – Fifth Banner Unlocked
You have just freed Iraj and Fariba’s bedroom from darkness. It is time to gather the items in the room and to progress onto the fifth banner.
1. Two items of note in the dresser to the far left of the room. This will be the marriage certificate which provides an important clue for later (take a picture, you cannot take the clipping with you)- and a light bulb.
2. Take the light bulb and screw it into the room leading down into the basement. This will provide you with two things, but only one you’ll notice- and that is access to the basement itself. The second is that you’ve just illuminated the next symbol you will need to dispel the darkness in the basement.
6. When you investigate the window in the room leading to the basement, it mentions the study. Return to the study and back to the window – you’ll now be able to see the symbol painted on the wall.
Return to the basement and draw the symbol.
Raha’s House – Computer Passcode, Leading up to 6th Banner
You have now unlocked the basement and are close to the end-game. In the basement you will uncover a light bulb, another newspaper article, power cable, and by this time you will also receive a wooden handle as well as a box cutter.
1. The light bulb goes to Iraj’s room upstairs but you’ll be prompted to notice there is no lamp shade. You can plug the power cable into the pc in the study, but you will be locked out by a passcode which is Iraj’s birthday. To receive this date, you will first need to discover the lampshade.
2. Return to your hotel room. Use the box cutter on the hollowed out floor to retrieve a shovel blade, a gun, and a clue as to where the bullet is.
Combine the wooden handle with the shovel blade. You can use this shovel in two places, the first step would be to use it on the broken tiles in the kitchen.
3. In the broken tiles you will uncover the lampshade. Take the lampshade to the bedroom and a message will be scrawled revealing the 5th anniversary of Iraj and Fariba, as well as the fact this coincides with Iraj’s birthday- so we can now unlock the computer in the study. They’ve been married since Iraj was 30 years old, this is their 5th anniversary, take the date and subtract 35 years- the passcode being: 1954-02-25.
4. You will listen to some messages on the PC, which triggers an event upstairs in the bedroom. You hear the phone ring, and when you answer it, you hear a woman wailing- and then are able to reenact Saeed’s dream in the mirror. This triggers the passcode for our next steps, so memorize it.
5. Taking the shovel to the basement, you are able to use the shovel to remove the mound of dirt- revealing a well and a door handle. There is something shiny at the bottom of the well, but you cannot reach it. The door handle goes to the upstairs room at the very end, near the piano. This will be where the 6th banner is.
To END – 6th Banner Unlock and Ending Explained
1. Walk to the end of the room. This will trigger the doll to begin playing the violin. Leave the room, and you will notice a new message scrawled in blood above the piano. “Come Play With Me,” it invites. The violin playing is the clue. You will need to play 4 notes on the piano, in descending order.
If you get stuck, I hover my mouse in the above picture against the first key to play. Click every key to the left until you’ve had the four notes play.
2. Entering back into the room, you see the symbol for the room’s banner- it was hidden behind the doll playing the violin. Write this on the banner and banish the darkness. Here you grab pliers, and are able to cut open the doll and remove the bullet. There is also a newspaper.
3. Combine the bullet with the gun to create a loaded gun. Use the pliers on the fork to bend it, rendering a bent fork. You’ve just recovered the items that will help you to reach down to the bottom of the well in the basement.
Go back outside and walk all the way up to the top of the stair case. Use the gun on the chain, and attach the chain to the bent fork. This creates a grappling hook. Take this and use it on the well in the basement; you will retrieve a metal box. It has a locking mechanism on it of four symbols. If you have forgotten the passcode, you can find it upstairs in the mirror– or you can view it here down below:
4. From the box you receive scented candles. Good job, you are about to finish the game! Take the candles into the downstairs bathroom, where Iraj had been shot and you had cut your hand on the bottle. Take the candles and put them in the holders. Nothing seems to happen. Do it again, and the lights will go out- your flashlight along with it.
Don’t worry, you don’t need your flashlight. Explore the darkness. You will see the hall from your dreams, with a light at the far end. When you click the final banner before you are ready, you can run to this light to stay alive.
5. There are 21 symbols on the wall- and this is a huge clue. You write the right symbol on the final banner to end the game. So what is it? Check out the bottom-most left letter. Look like an A. I drew more of an ^ and the banner unlocked.
That’s all we are sharing today in Lightless: The 21st Sacrifice (Episode 1) Full Walkthrough, if there are anything you want to add please feel free to leave a comment below and we’ll see you soon.
Как играется?
А по-прежнему играется. Всё также затягивающе и гипнотически-осязательно. Разработчики явно не собирались отказываться от выведенной три года назад успешной формулы, так что концепция неизменна: есть помещение, есть механизм, есть механизмы внутри механизма, и в них, если поискать, тоже наверняка найдётся какой-нибудь «-изм». Конечная задача — выбраться на свободу (ну или хотя бы куда-нибудь), умело используя все доступные шестерёнки, педальки и потайные клавиши.
Основное отличие третьей «Комнаты» от предыдущих частей — собственно, количество комнат. Если первая The Room была скорее The Box, а вторая как раз более-менее оправдывала своё название (пусть локация там была и не одна), то третью серию франшизы стоило бы назвать The Rooms. Потому как на этот раз в нашем распоряжении целый замок. Зловещий, покинутый всеми, пухнущий от загадок и расположенный на изолированном острове — параллели с Myst так и напрашиваются.
И всё бы ничего (больше карта — больше фана), вот только передвигаться самостоятельно главный герой так и не научился. Переключаться от объекта к объекту — это пожалуйста, а сделать два шага по направлению к стене, чтобы висящий на ней условный план лабиринта оставался в зоне видимости — нет, увы. С одной стороны, чудовищно неудобно. С другой — таким образом авторы непрозрачно напоминают нам: пазлы превыше всего, а квесты-бродилки ищите где-нибудь ещё.
Лавкрафтианский сюжет про поиски неведомого, немыслимого (Богохульного! Нечестивого!) Нуля скромен и выступает здесь в качестве заводской смазки для хитроумных головоломок. А вот на разнообразие задачек создатели не поскупились. Этого добра — на любой вкус: от примитивных пятнашек и до объёмных моделей, требующих особенного угла обзора, или, например, сложных движущихся конструкций, которыми нужно отбросить тень правильной формы. Но основа основ тут, как и раньше, — шкатулки «с секретом». Вертеть, нажимать, переключать и доводить на них рычаги и детальки — истинное удовольствие, настоящий гимн тактильности и виртуальный рай для кинестетиков.
Однако трогать всё это куда приятнее, чем непосредственно разгадывать (особенно если проходишь запоем), потому что всерьёз корпеть над The Room Three невозможно. Чтобы осилить большинство пазлов, достаточно базового логического мышления и наблюдательности: щелкаются они на раз-два. К тому же, безотказная система многоуровневых подсказок (отключаемых, кстати) всегда к нашим услугам. Вот только хинты эти в некотором смысле коварны: если слепо следовать всем наводящим советам, есть риск упустить из виду кучу побочных объектов разной степени важности и нужности. До какой-никакой концовки подсказки вас, конечно, доведут, но её тональность будет не самой удачной с точки зрения сюжета. Лень наказуема, ага.
Ах да, вас ждёт по меньшей мере четыре варианта финала. Официально они триггерятся в зависимости от совершенных игроком действий и выборов, но по факту — благодаря упущенным из виду объектам и провороненным тайникам. Впрочем, провернуть назад невозможно только фарш, и по завершении первичного прохождения появляется шанс добраться-таки до альтернативной развязки и изменить свою судьбу. Хинтов свыше в таком режиме уже не положено. Тут-то всё самое интересное и начинается — беготня по комнатам, внимательное чтение интригующих записок от явно полоумного Мастера, перебор предметов в инвентаре. В общем, наш вам совет: отключайте подсказки сразу, веселее будет в разы.
Lightless: The 21st Sacrifice (Episode 1) Full Walkthrough
If you play Lightless: The 21st Sacrifice (Episode 1) and looking for a 100% walkthrough, this guide is exactly what you are looking for providing a complete walkthrough with images, let’s check it out.
Table of Contents
The Hotel Room – How to Leave
You enter into your room after traveling to Iran to wax nostalgic about your childhood days. Hover and click over objects to interact. A magnifying glass will appear if you can investigate, and a hand will appear if you’re able to lift the object.
1. In this room, you pick up a camera. In order to access the camera or any items you pick up throughout the game, hover your mouse to the top of the screen for the drop-down menu. Select the camera in the drop down menu (not the bottom left icon) and snap a picture of the empty frame hanging on the wall to the left of the room by the bed. You’ll receive a picture sending you a creepy message, which triggers the onset of a fog and a drop off to sleep for Navid.
2. The hotel room has changed when you wake up. You are able to leave, but take note of the changes to the room- you’ll be returning here, as you’ll return to all the rooms at least once, to interact. Leave out the door and enter the next up the flight of stairs, Navid will recognize it as Raha’s childhood home.
Raha’s House – The First Banner Unlock
All the rest of the doors are locked, but you’re able to go upstairs. You’ll notice a broken transistor radio. You pass by the grandfather clock and are able to peer into a bedroom, but this will remain locked for now too. This is Iraj’s and his wife Fariba’s bedroom. On the floor next to Iraj’s bedroom and the boarded door, you will be able to pick up a safety glove.
3. If you continue onto the left, you’ll notice someone has tried to block the hallway. There’s a door locked by the darkness, which you will be able to access later. To the left of this door, you receive your first symbol which you will need to write on the first banner to banish the darkness. As described on the wall, you will need a paint brush and your blood.
4. It’s time to use the safety glove you have picked up. Go back downstairs and to the very first locked door. Use the gloves from your inventory to switch on the light and investigate the bathroom through the peep-hole. You won’t be able to enter the room, but you’ll notice a dead body and a broken bottle. As you walk back to the right through the house, you will begin to hear chanting.
5. You will have to go upstairs and interact with the transistor radio to shut off the chanting. This results in the sound of a door opening. Go downstairs to investigate the changes to the house. You are now able to enter the bathroom, and interact with things inside. You get a scrub brush off the bathroom sink, and you cut your hand on the broken bottle on the toilet, resulting in blood on the floor. It will be this blood you combine with the paintbrush to write the symbol. You can pick up another note from top of the hamper.
6. After you’ve combined the paint brush with your blood on the floor, you get a bloody paintbrush. Return upstairs to write the first symbol and banish the darkness.
Raha’s House – Second and Third Banner Unlock
After you’ve written the symbol to the first banner, the darkness in this area is banished and you are able to interact with reality again. The new unlocked rooms are your keys to progressing.
1. Although the darkness is lifted, the door at the left-most of the house remains locked. However, a little bit to your right, a door is now lit up and ready to explore. Enter in and it reveals another bathroom, sealed by darkness.
2. To acclimate you to the game, the next symbol is an easy spot. It’s right there in the bathroom. After you’ve written this on the banner inside the bathroom, you will have already banished your second bit of darkness.
3. The second banner is unlocked and now you can interact with items in the bathroom. There’s a newspaper on the toilet by the bloody bath; there is liquid detergent on top of the washer; when you investigate the bathroom sink, you will notice a screwdriver you cannot pick up. The game says that it is too rusted to be useful. You notice something shiny on top of the bathroom mirror, but it is out of reach. Here is where your fly swatter comes into play, landing you a key.
4. Take the bronze key and go downstairs. As you do, you will notice that the house has once again changed. Giant red letters appear on Raha’s door, which you’re able to investigate. Directly to the right of the stairwell you use the key to unlock the door. It’s a study/computer room, shrouded in darkness. Here is the third banner, but you’ll notice, there is no symbol painted inside. Though, you do find a surprise.
5. This causes us to recall what we’ve grabbed from the unlocked upstairs bathroom. Combine the liquid detergent with the scrub brush to create a soaked brush. This is going to help us find the symbol needed to unlock the study. As you’ll recall after leaving your hotel room, there is a musty sign on the way up to Raha’s door. This is where we’ll uncover the symbol.
Go and write the symbol on the banner in the study.
Raha’s House – Fourth Banner Unlocked
So you have just unlocked the study on the ground floor of the house, and you’re able to interact with the room. There’s a window to your right which appears useless- which only for right now, it is. There is a computer, but the power cable is missing.
1. Grab the paperclip off of the desk. There is also a newspaper on the bookshelf. The paperclip unlocks the dresser in the hall right beside the study. When you use the paperclip on the table, you will receive men’s perfume. You take note that this is the perfume Iraj wore.
3. Fariba is Iraj’s wife, and the one holding the door shut to the upstairs bedroom with the noose. You take the men’s perfume and spray it on the door. This tricks her into thinking you are “him”, Iraj, and the door unlocks.
4. As soon as you investigate the room with your flashlight, you will notice a symbol reflected in the mirror.
Take note that the symbol is not written on the mirror, but on the wall behind you. You will need to write the symbol flipped horizontally.
**If you get stuck with the spirit in the room, remember to point your flashlight directly in front of you, do not tilt it around**
Raha’s House – Fifth Banner Unlocked
You have just freed Iraj and Fariba’s bedroom from darkness. It is time to gather the items in the room and to progress onto the fifth banner.
1. Two items of note in the dresser to the far left of the room. This will be the marriage certificate which provides an important clue for later (take a picture, you cannot take the clipping with you)- and a light bulb.
2. Take the light bulb and screw it into the room leading down into the basement. This will provide you with two things, but only one you’ll notice- and that is access to the basement itself. The second is that you’ve just illuminated the next symbol you will need to dispel the darkness in the basement.
6. When you investigate the window in the room leading to the basement, it mentions the study. Return to the study and back to the window – you’ll now be able to see the symbol painted on the wall.
Return to the basement and draw the symbol.
Raha’s House – Computer Passcode, Leading up to 6th Banner
You have now unlocked the basement and are close to the end-game. In the basement you will uncover a light bulb, another newspaper article, power cable, and by this time you will also receive a wooden handle as well as a box cutter.
1. The light bulb goes to Iraj’s room upstairs but you’ll be prompted to notice there is no lamp shade. You can plug the power cable into the pc in the study, but you will be locked out by a passcode which is Iraj’s birthday. To receive this date, you will first need to discover the lampshade.
2. Return to your hotel room. Use the box cutter on the hollowed out floor to retrieve a shovel blade, a gun, and a clue as to where the bullet is.
Combine the wooden handle with the shovel blade. You can use this shovel in two places, the first step would be to use it on the broken tiles in the kitchen.
3. In the broken tiles you will uncover the lampshade. Take the lampshade to the bedroom and a message will be scrawled revealing the 5th anniversary of Iraj and Fariba, as well as the fact this coincides with Iraj’s birthday- so we can now unlock the computer in the study. They’ve been married since Iraj was 30 years old, this is their 5th anniversary, take the date and subtract 35 years- the passcode being: 1954-02-25.
4. You will listen to some messages on the PC, which triggers an event upstairs in the bedroom. You hear the phone ring, and when you answer it, you hear a woman wailing- and then are able to reenact Saeed’s dream in the mirror. This triggers the passcode for our next steps, so memorize it.
5. Taking the shovel to the basement, you are able to use the shovel to remove the mound of dirt- revealing a well and a door handle. There is something shiny at the bottom of the well, but you cannot reach it. The door handle goes to the upstairs room at the very end, near the piano. This will be where the 6th banner is.
To END – 6th Banner Unlock and Ending Explained
1. Walk to the end of the room. This will trigger the doll to begin playing the violin. Leave the room, and you will notice a new message scrawled in blood above the piano. “Come Play With Me,” it invites. The violin playing is the clue. You will need to play 4 notes on the piano, in descending order.
If you get stuck, I hover my mouse in the above picture against the first key to play. Click every key to the left until you’ve had the four notes play.
2. Entering back into the room, you see the symbol for the room’s banner- it was hidden behind the doll playing the violin. Write this on the banner and banish the darkness. Here you grab pliers, and are able to cut open the doll and remove the bullet. There is also a newspaper.
3. Combine the bullet with the gun to create a loaded gun. Use the pliers on the fork to bend it, rendering a bent fork. You’ve just recovered the items that will help you to reach down to the bottom of the well in the basement.
Go back outside and walk all the way up to the top of the stair case. Use the gun on the chain, and attach the chain to the bent fork. This creates a grappling hook. Take this and use it on the well in the basement; you will retrieve a metal box. It has a locking mechanism on it of four symbols. If you have forgotten the passcode, you can find it upstairs in the mirror– or you can view it here down below:
4. From the box you receive scented candles. Good job, you are about to finish the game! Take the candles into the downstairs bathroom, where Iraj had been shot and you had cut your hand on the bottle. Take the candles and put them in the holders. Nothing seems to happen. Do it again, and the lights will go out- your flashlight along with it.
Don’t worry, you don’t need your flashlight. Explore the darkness. You will see the hall from your dreams, with a light at the far end. When you click the final banner before you are ready, you can run to this light to stay alive.
5. There are 21 symbols on the wall- and this is a huge clue. You write the right symbol on the final banner to end the game. So what is it? Check out the bottom-most left letter. Look like an A. I drew more of an ^ and the banner unlocked.
That’s all we are sharing today in Lightless: The 21st Sacrifice (Episode 1) Full Walkthrough, if there are anything you want to add please feel free to leave a comment below and we’ll see you soon.
Как смотрится?
Сказать, что игра красива — не сказать ничего. В тщательно проработанных локациях помимо движущих сюжет объектов полно шикарных интерьерных деталей, которые привносят в историю элемент правдоподобности. Глубины и достоверности картинке добавляют разнообразные тени, блики и преломление света. И это вдобавок к вполне реалистичным скрипам, постукиваниям и скрежету, которые обязательно сопровождают любые наши манипуляции с объектами. Во все эти механизмы и устройства веришь настолько, что на определённом этапе действительно начинаешь чувствовать под пальцем фантомный холод металлического ключа или шероховатость деревянного бруса. Феномен синестезии в чистом виде! Невероятно же!
Знакомая нам по предыдущим играм мелодия никуда не делась. Однако если во второй части её появление вызывало недоумение (как так: неужели ничего нового записать не успели?), то здесь этот вкрадчивый мотивчик — уже своего рода визитная карточка. Локализация, к слову, блестящая: для сюжетных документов не поленились даже кириллический шрифт отрисовать.
Lightless: The 21st Sacrifice (Episode 1) Full Walkthrough
If you play Lightless: The 21st Sacrifice (Episode 1) and looking for a 100% walkthrough, this guide is exactly what you are looking for providing a complete walkthrough with images, let’s check it out.
Table of Contents
The Hotel Room – How to Leave
You enter into your room after traveling to Iran to wax nostalgic about your childhood days. Hover and click over objects to interact. A magnifying glass will appear if you can investigate, and a hand will appear if you’re able to lift the object.
1. In this room, you pick up a camera. In order to access the camera or any items you pick up throughout the game, hover your mouse to the top of the screen for the drop-down menu. Select the camera in the drop down menu (not the bottom left icon) and snap a picture of the empty frame hanging on the wall to the left of the room by the bed. You’ll receive a picture sending you a creepy message, which triggers the onset of a fog and a drop off to sleep for Navid.
2. The hotel room has changed when you wake up. You are able to leave, but take note of the changes to the room- you’ll be returning here, as you’ll return to all the rooms at least once, to interact. Leave out the door and enter the next up the flight of stairs, Navid will recognize it as Raha’s childhood home.
Raha’s House – The First Banner Unlock
All the rest of the doors are locked, but you’re able to go upstairs. You’ll notice a broken transistor radio. You pass by the grandfather clock and are able to peer into a bedroom, but this will remain locked for now too. This is Iraj’s and his wife Fariba’s bedroom. On the floor next to Iraj’s bedroom and the boarded door, you will be able to pick up a safety glove.
3. If you continue onto the left, you’ll notice someone has tried to block the hallway. There’s a door locked by the darkness, which you will be able to access later. To the left of this door, you receive your first symbol which you will need to write on the first banner to banish the darkness. As described on the wall, you will need a paint brush and your blood.
4. It’s time to use the safety glove you have picked up. Go back downstairs and to the very first locked door. Use the gloves from your inventory to switch on the light and investigate the bathroom through the peep-hole. You won’t be able to enter the room, but you’ll notice a dead body and a broken bottle. As you walk back to the right through the house, you will begin to hear chanting.
5. You will have to go upstairs and interact with the transistor radio to shut off the chanting. This results in the sound of a door opening. Go downstairs to investigate the changes to the house. You are now able to enter the bathroom, and interact with things inside. You get a scrub brush off the bathroom sink, and you cut your hand on the broken bottle on the toilet, resulting in blood on the floor. It will be this blood you combine with the paintbrush to write the symbol. You can pick up another note from top of the hamper.
6. After you’ve combined the paint brush with your blood on the floor, you get a bloody paintbrush. Return upstairs to write the first symbol and banish the darkness.
Raha’s House – Second and Third Banner Unlock
After you’ve written the symbol to the first banner, the darkness in this area is banished and you are able to interact with reality again. The new unlocked rooms are your keys to progressing.
1. Although the darkness is lifted, the door at the left-most of the house remains locked. However, a little bit to your right, a door is now lit up and ready to explore. Enter in and it reveals another bathroom, sealed by darkness.
2. To acclimate you to the game, the next symbol is an easy spot. It’s right there in the bathroom. After you’ve written this on the banner inside the bathroom, you will have already banished your second bit of darkness.
3. The second banner is unlocked and now you can interact with items in the bathroom. There’s a newspaper on the toilet by the bloody bath; there is liquid detergent on top of the washer; when you investigate the bathroom sink, you will notice a screwdriver you cannot pick up. The game says that it is too rusted to be useful. You notice something shiny on top of the bathroom mirror, but it is out of reach. Here is where your fly swatter comes into play, landing you a key.
4. Take the bronze key and go downstairs. As you do, you will notice that the house has once again changed. Giant red letters appear on Raha’s door, which you’re able to investigate. Directly to the right of the stairwell you use the key to unlock the door. It’s a study/computer room, shrouded in darkness. Here is the third banner, but you’ll notice, there is no symbol painted inside. Though, you do find a surprise.
5. This causes us to recall what we’ve grabbed from the unlocked upstairs bathroom. Combine the liquid detergent with the scrub brush to create a soaked brush. This is going to help us find the symbol needed to unlock the study. As you’ll recall after leaving your hotel room, there is a musty sign on the way up to Raha’s door. This is where we’ll uncover the symbol.
Go and write the symbol on the banner in the study.
Raha’s House – Fourth Banner Unlocked
So you have just unlocked the study on the ground floor of the house, and you’re able to interact with the room. There’s a window to your right which appears useless- which only for right now, it is. There is a computer, but the power cable is missing.
1. Grab the paperclip off of the desk. There is also a newspaper on the bookshelf. The paperclip unlocks the dresser in the hall right beside the study. When you use the paperclip on the table, you will receive men’s perfume. You take note that this is the perfume Iraj wore.
3. Fariba is Iraj’s wife, and the one holding the door shut to the upstairs bedroom with the noose. You take the men’s perfume and spray it on the door. This tricks her into thinking you are “him”, Iraj, and the door unlocks.
4. As soon as you investigate the room with your flashlight, you will notice a symbol reflected in the mirror.
Take note that the symbol is not written on the mirror, but on the wall behind you. You will need to write the symbol flipped horizontally.
**If you get stuck with the spirit in the room, remember to point your flashlight directly in front of you, do not tilt it around**
Raha’s House – Fifth Banner Unlocked
You have just freed Iraj and Fariba’s bedroom from darkness. It is time to gather the items in the room and to progress onto the fifth banner.
1. Two items of note in the dresser to the far left of the room. This will be the marriage certificate which provides an important clue for later (take a picture, you cannot take the clipping with you)- and a light bulb.
2. Take the light bulb and screw it into the room leading down into the basement. This will provide you with two things, but only one you’ll notice- and that is access to the basement itself. The second is that you’ve just illuminated the next symbol you will need to dispel the darkness in the basement.
6. When you investigate the window in the room leading to the basement, it mentions the study. Return to the study and back to the window – you’ll now be able to see the symbol painted on the wall.
Return to the basement and draw the symbol.
Raha’s House – Computer Passcode, Leading up to 6th Banner
You have now unlocked the basement and are close to the end-game. In the basement you will uncover a light bulb, another newspaper article, power cable, and by this time you will also receive a wooden handle as well as a box cutter.
1. The light bulb goes to Iraj’s room upstairs but you’ll be prompted to notice there is no lamp shade. You can plug the power cable into the pc in the study, but you will be locked out by a passcode which is Iraj’s birthday. To receive this date, you will first need to discover the lampshade.
2. Return to your hotel room. Use the box cutter on the hollowed out floor to retrieve a shovel blade, a gun, and a clue as to where the bullet is.
Combine the wooden handle with the shovel blade. You can use this shovel in two places, the first step would be to use it on the broken tiles in the kitchen.
3. In the broken tiles you will uncover the lampshade. Take the lampshade to the bedroom and a message will be scrawled revealing the 5th anniversary of Iraj and Fariba, as well as the fact this coincides with Iraj’s birthday- so we can now unlock the computer in the study. They’ve been married since Iraj was 30 years old, this is their 5th anniversary, take the date and subtract 35 years- the passcode being: 1954-02-25.
4. You will listen to some messages on the PC, which triggers an event upstairs in the bedroom. You hear the phone ring, and when you answer it, you hear a woman wailing- and then are able to reenact Saeed’s dream in the mirror. This triggers the passcode for our next steps, so memorize it.
5. Taking the shovel to the basement, you are able to use the shovel to remove the mound of dirt- revealing a well and a door handle. There is something shiny at the bottom of the well, but you cannot reach it. The door handle goes to the upstairs room at the very end, near the piano. This will be where the 6th banner is.
To END – 6th Banner Unlock and Ending Explained
1. Walk to the end of the room. This will trigger the doll to begin playing the violin. Leave the room, and you will notice a new message scrawled in blood above the piano. “Come Play With Me,” it invites. The violin playing is the clue. You will need to play 4 notes on the piano, in descending order.
If you get stuck, I hover my mouse in the above picture against the first key to play. Click every key to the left until you’ve had the four notes play.
2. Entering back into the room, you see the symbol for the room’s banner- it was hidden behind the doll playing the violin. Write this on the banner and banish the darkness. Here you grab pliers, and are able to cut open the doll and remove the bullet. There is also a newspaper.
3. Combine the bullet with the gun to create a loaded gun. Use the pliers on the fork to bend it, rendering a bent fork. You’ve just recovered the items that will help you to reach down to the bottom of the well in the basement.
Go back outside and walk all the way up to the top of the stair case. Use the gun on the chain, and attach the chain to the bent fork. This creates a grappling hook. Take this and use it on the well in the basement; you will retrieve a metal box. It has a locking mechanism on it of four symbols. If you have forgotten the passcode, you can find it upstairs in the mirror– or you can view it here down below:
4. From the box you receive scented candles. Good job, you are about to finish the game! Take the candles into the downstairs bathroom, where Iraj had been shot and you had cut your hand on the bottle. Take the candles and put them in the holders. Nothing seems to happen. Do it again, and the lights will go out- your flashlight along with it.
Don’t worry, you don’t need your flashlight. Explore the darkness. You will see the hall from your dreams, with a light at the far end. When you click the final banner before you are ready, you can run to this light to stay alive.
5. There are 21 symbols on the wall- and this is a huge clue. You write the right symbol on the final banner to end the game. So what is it? Check out the bottom-most left letter. Look like an A. I drew more of an ^ and the banner unlocked.
That’s all we are sharing today in Lightless: The 21st Sacrifice (Episode 1) Full Walkthrough, if there are anything you want to add please feel free to leave a comment below and we’ll see you soon.

